









Dealing with the effects of hard water—spotty dishes, stiff laundry, and scale buildup on your faucets—gets old fast. A water softener is the best solution, and if your home is pre-plumbed, you’re already halfway to solving the problem. A pre-plumbed loop simplifies the process immensely, taking the intimidating task of cutting into your main water line off the table. This guide focuses specifically on how to install a water softener in pre-plumbed house, providing clear, step-by-step instructions for a secure, effective setup. Following these steps will help protect your home’s entire residential plumbing system, especially your water heater, from damaging mineral buildup.
Key Takeaways
- Test Your Water and Plan Your Space First: Before you buy a unit, test your water’s hardness level to ensure you choose the right size. Find a location for the softener near your main water line that also has easy access to a power outlet and a drain.
- Focus on a Leak-Free and Functional Setup: The most critical parts of the installation are the connections. Ensure the bypass valve is installed correctly for future maintenance and that the drain line has an air gap to prevent backflow and potential water damage.
- Commit to Simple, Regular Maintenance: Keep your system running effectively by checking the salt level monthly and cleaning the brine tank annually. Knowing how to perform these basic tasks will protect your investment and prevent common performance issues.
What is a Water Softener? (And Why Your Home Might Need One)
If you’ve ever noticed chalky white residue on your faucets or found that your soap just won’t lather, you’ve likely met hard water. A water softener is a filtration system that removes hard minerals—mainly calcium and magnesium—from your home’s water supply. Think of it as a gatekeeper for your plumbing. As water enters your home, it passes through the softener, which traps these minerals and sends softer, cleaner water to your taps and appliances.
This process is more than a luxury; it’s a crucial step in protecting your home’s plumbing from scale buildup, which can damage pipes and appliances. By installing a water softener, you’re making a smart investment in your home’s longevity and preventing future plumbing headaches.
How soft water improves your home
Switching to soft water brings a surprising number of benefits. First, it protects your plumbing by preventing the scale buildup that clogs pipes and damages appliances. This helps extend the lifespan of your dishwasher and is especially important for your water heater, as scale can reduce its efficiency and lead to the need for hot water heater repair. You’ll also find that cleaning is much easier without stubborn soap scum on your shower doors and dishes. Plus, soft water is gentler on your body, leaving you with softer skin and silkier hair after every wash.
Telltale signs you have hard water
Not sure if you have hard water? Your house will give you some clear clues. The most obvious sign is the white, crusty scale on your faucets and showerheads. You might also notice your dishes have a cloudy film even when clean. In the bathroom, look for stubborn soap scum rings. Another telltale sign is that soaps and shampoos don’t lather well, forcing you to use more product. Over time, this mineral buildup can lead to clogs that require professional drain cleaning services. Dry, itchy skin can also be a symptom.
Common water softener myths, busted
One of the biggest myths is that water softeners are only for homes with extremely hard water. The truth is, even moderately hard water causes problems over time. While you might not see severe scale buildup right away, the minerals are still affecting your pipes and appliances behind the scenes. Waiting for a major issue is a costly mistake. Think of a water softener as a preventative measure, much like changing your car’s oil. It’s a simple step that protects a much larger system and improves your home’s comfort.
Your Water Softener Installation Checklist
Getting organized before you start any home project is the key to a smooth process, and installing a water softener is no exception. Having everything you need on hand means you won’t have to make a last-minute trip to the hardware store with your water shut off. This checklist covers the essential tools, materials, and sizing information you’ll need to get the job done right. Think of it as your game plan for tackling hard water once and for all.
The tools you’ll need
You don’t need a professional-grade workshop, but you will need a few specific tools to handle the plumbing connections. Before you begin, gather a pipe wrench, a screwdriver, a pipe cutter, and a tape measure. You’ll also want to have a bucket and some old towels nearby to catch any residual water when you cut into the pipes. For sealing the new connections, make sure you have PTFE tape (also known as Teflon tape). Depending on your home’s existing plumbing, you might also need flexible tubing, compression fittings, and a torch with solder if you’re working with copper pipes.
Essential materials and fittings
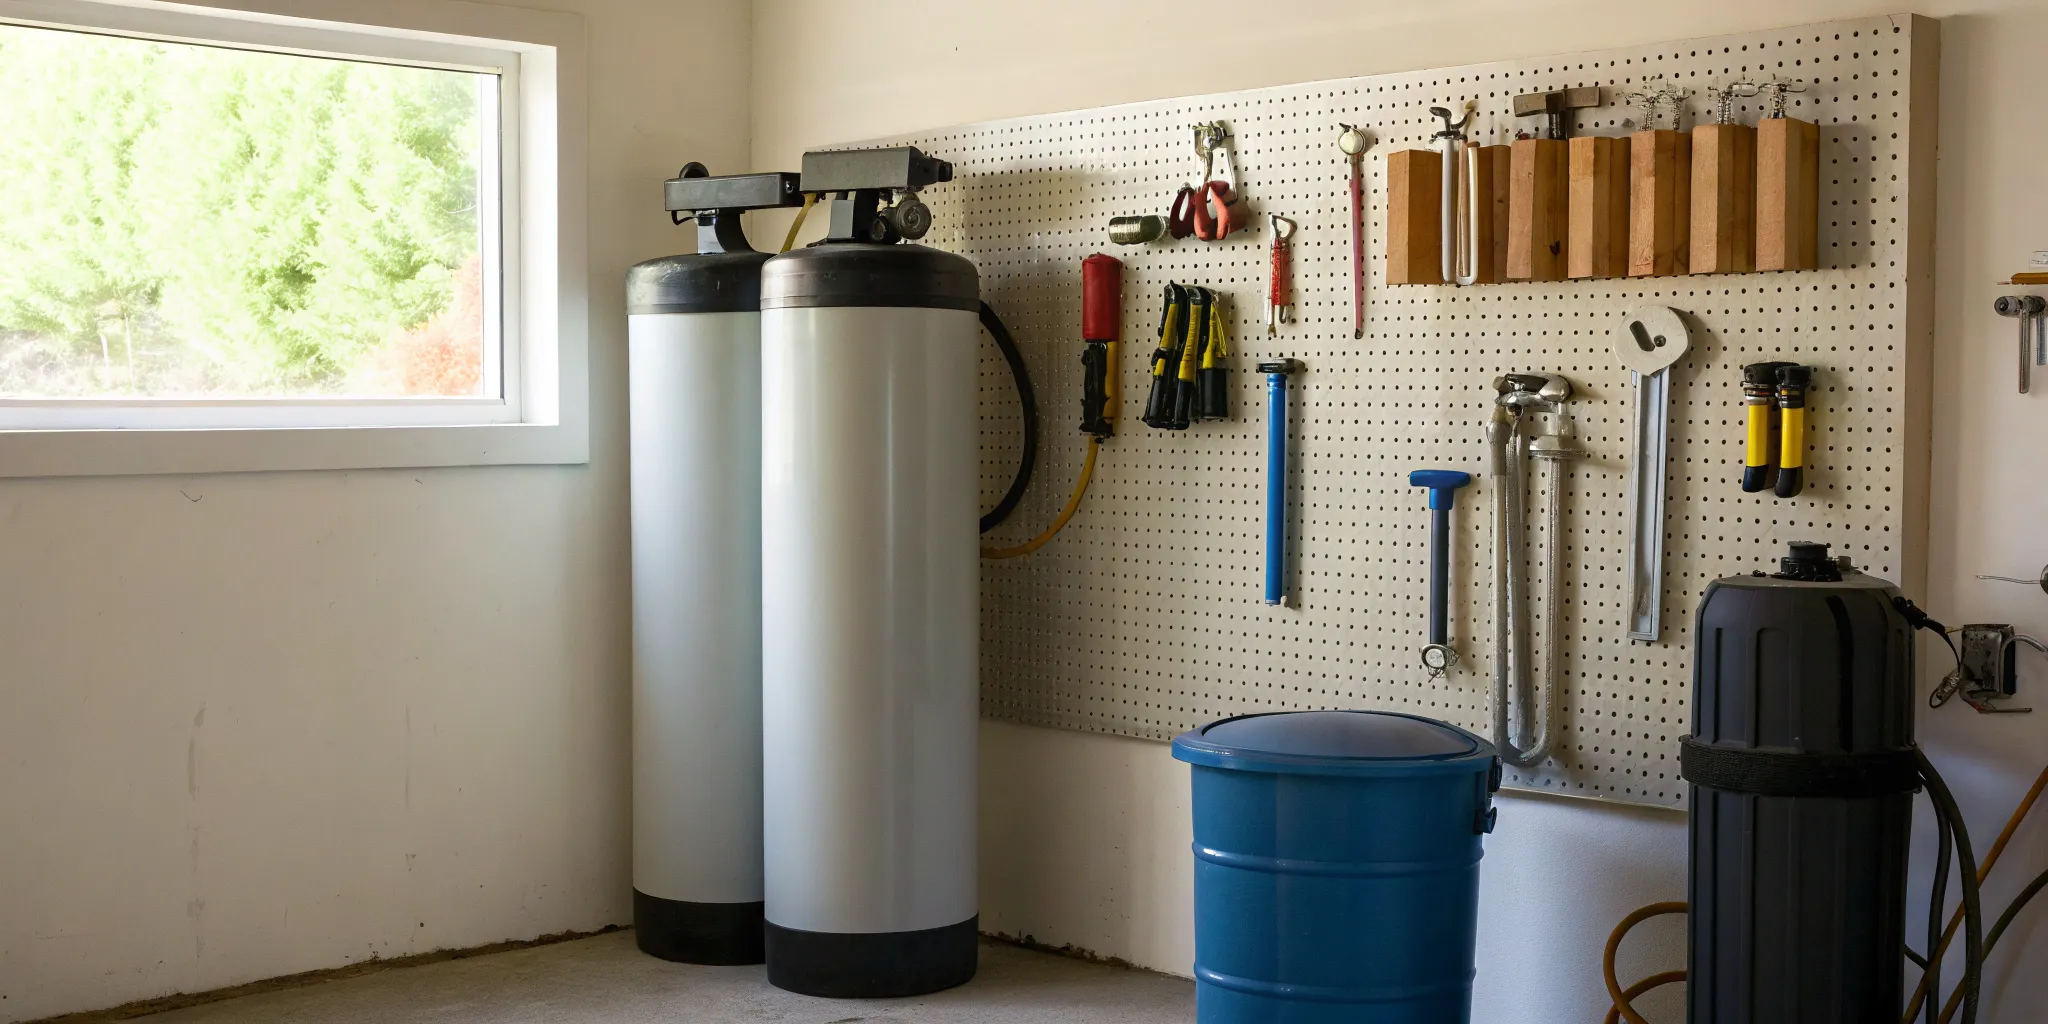
Your water softener unit will come with its main components: the mineral tank (where the magic happens), the brine tank (where you’ll add the salt), and the control valve (the brains of the operation). The system uses resin beads inside the mineral tank to trap hard minerals. You’ll also have a bypass valve, which is crucial for maintenance as it lets you redirect water flow away from the softener. You’ll need the correct fittings to connect the unit to your home’s main water line. Ensuring these connections are secure is the most important part of any plumbing fixture installation.
How to choose the right size water softener
Picking the right size water softener is a balancing act. A unit that’s too small will constantly be regenerating, wasting salt and water. One that’s too large will be less efficient and cost more upfront. To find the perfect fit, you first need to know your water hardness level, which is measured in grains per gallon (GPG). You can find this information from your local water utility or by using a home test kit. Once you have that number, you can choose a softener with the right grain capacity for your household’s daily water usage. Getting this right ensures your system runs efficiently for years to come.
Find the Perfect Spot for Your Water Softener
Choosing the right location for your water softener is just as important as picking the right unit. The perfect spot ensures your system works efficiently and makes future maintenance a breeze. You’ll want a location that’s level, dry, and won’t be exposed to freezing temperatures. Most people install their softeners in a basement, garage, or utility closet near the main water shutoff valve. Before you start connecting pipes, let’s walk through the three key things to consider: accessibility, power and drainage, and your home’s existing plumbing setup. Getting this part right from the start will save you a lot of headaches down the road.
Checking for space and accessibility
Your water softener needs to be installed on your home’s main water supply line before it connects to your water heater. This is a critical step because it ensures that both your hot and cold water get treated. Placing it after the water heater would leave your most expensive appliance vulnerable to scale buildup, which can lead to costly hot water heater repair. You also need to make sure there’s enough physical space to not only fit the unit but also to access it easily. Remember, you’ll need to add salt to the brine tank regularly, so pick a spot where you can comfortably lift and pour a heavy bag of salt without any trouble.
Planning for power and drainage
A water softener needs two things to run its regeneration cycle: electricity and a place to drain. You’ll need a standard 110-volt electrical outlet nearby to power the control valve. It’s best to avoid using an extension cord for a permanent installation. The system also needs to flush out the salty brine during regeneration, so you must have access to a drain. This could be a floor drain, a utility sink, or a standpipe. The drain line needs to be properly secured with an air gap to prevent backflow, ensuring the wastewater doesn’t contaminate your softened water supply.
Using your home’s pre-plumbed loop
If you’re lucky, your home might already have a pre-plumbed loop for a water softener. This is a set of pipes, usually in the garage or utility room, designed specifically to make installation simple. A loop essentially creates a detour from the main water line, with an inlet and an outlet pipe ready to connect directly to your softener. This setup takes the guesswork out of understanding your home’s residential plumbing and means you won’t have to cut into your main water line. If you have a loop, you’re already several steps ahead in the installation process and can look forward to a much smoother setup.
How to Install Your Water Softener: A Step-by-Step Guide
Ready to tackle your water softener installation? It’s a manageable project if you’re comfortable with basic plumbing, but it requires careful attention to detail. This guide will walk you through each step, from prepping your space to programming your new system. Remember, the goal is a leak-free setup that provides your home with soft water for years to come. If you ever feel out of your depth, don’t hesitate to call in a professional. A small mistake can lead to big water problems, and it’s always better to be safe than sorry. Let’s get started.
Step 1: Shut off the water and prep your space
First things first: you need to shut off the main water supply to your home. You can usually find the main shut-off valve in your basement, crawl space, or near the water meter. Once the water is off, open a faucet on the lowest level of your house, like a basement sink, to drain any remaining water from the pipes. This will help prevent a watery mess when you cut into the main line. Make sure your work area is clean, dry, and well-lit so you have plenty of room to maneuver the unit and your tools. This initial prep work is a crucial part of any residential plumbing project.
Step 2: Cut the main line and add fittings
With the water off and the pipes drained, it’s time to make your cut. Using a pipe cutter, carefully slice through the main water line where you plan to install the softener. It’s a good idea to keep a bucket and some towels handy to catch any drips. This cut creates the opening you need to connect the water softener’s bypass valve to your home’s plumbing. Measure twice and cut once to ensure a clean, straight cut. A precise cut is essential for a secure, leak-free connection. If you’re not confident, remember that a professional can handle any plumbing leak repair if you run into trouble.
Step 3: Position and connect the unit
Now, move your water softener into its final position. The ideal spot is on a level surface, close to the main water line, and before your water heater. This placement ensures that both your hot and cold water will be softened. Connect the inlet and outlet ports on the softener’s bypass valve to the two ends of the pipe you just cut. Most units come with flexible connector hoses to make this easier. Make sure the inlet is connected to the pipe coming from your water supply and the outlet is connected to the pipe that feeds your house and water heater installations. Hand-tighten the connections first, then give them a final turn with a wrench.
Step 4: Install the bypass valve
The bypass valve is your best friend when it comes to maintenance. It allows you to route water around the softener without shutting off the water to your entire house. This is perfect for when you need to service the unit or if you want to use hard water for tasks like watering your lawn. Most water softeners come with a bypass valve that clips or screws directly onto the main unit. Attach it according to the manufacturer’s instructions, ensuring the O-rings are properly seated to create a watertight seal. Once installed, make sure the valve is in the “bypass” position before you turn the water back on.
Step 5: Connect the drain and overflow lines
Your water softener needs a place to send the wastewater from its regeneration cycle. Attach the drain hose to the designated port on the control valve and run it to a nearby floor drain, utility sink, or standpipe. It’s important to maintain an air gap of at least two inches between the end of the hose and the drain opening. This prevents dirty water from siphoning back into your system. Next, connect the overflow tube to the brine tank. This is a safety feature that directs excess water to the drain in case of a malfunction, preventing a flood. Proper drainage is key, so ensure your lines are clear and secure, just as you would for any drain cleaning services.
Step 6: Add salt and program your system
You’re on the home stretch! With all the connections made, it’s time to bring your system to life. Slowly open the main water supply valve to let the pipes fill. Then, use the bypass valve to slowly introduce water into the softener, which will push out any trapped air. Check every connection for leaks. Once you’re confident everything is dry, plug in the unit. Follow the manual to run a manual regeneration or backwash cycle to flush out any debris. Finally, add the recommended type of salt to the brine tank and program the control valve with your water hardness level and the number of people in your home.
Common Installation Mistakes to Avoid
Installing a water softener can feel like a major win for your home. But even with a pre-plumbed loop, a few small missteps can lead to big problems, from messy leaks to a system that just doesn’t work right. Getting the installation right the first time saves you from future headaches and costly repairs. It’s about more than just connecting pipes; it’s about ensuring your new appliance runs efficiently for years to come.
Think of it like this: you’ve already invested in the unit, so taking the time to avoid these common mistakes protects that investment. A proper setup ensures you get all the benefits of soft water—like cleaner dishes, softer skin, and longer-lasting appliances—without any of the stress. If you find yourself feeling unsure at any point, remember that getting professional help with your residential plumbing projects is always a smart move. Let’s walk through the most frequent installation errors so you can steer clear of them.
Incorrect drain line setup
One of the most critical parts of the installation is the drain line, which flushes out the hard minerals during the regeneration cycle. If this line isn’t secure or positioned correctly, you’re setting yourself up for leaks or even a minor flood. Make sure there’s an air gap between the end of the drain tube and the drain itself to prevent backflow. The line should also be free of kinks and run on a downward slope to ensure water flows out smoothly. A poorly installed drain line can cause pressure buildup and water damage, turning your DIY project into a call for an emergency water leak repair.
Bypass valve installation errors
The bypass valve is your best friend when it comes to maintenance. This valve allows you to shut off water flow to the softener without cutting off water to your entire house. Forgetting to install it or installing it backward is a mistake you’ll regret later. Without a functioning bypass valve, simple tasks like adding salt or performing routine cleaning become a huge hassle. Double-check that the arrows on the valve match the direction of your water flow. This small step ensures you can easily service your unit or call for repairs without disrupting your home’s water supply.
Skipping the water hardness test
It might be tempting to buy a water softener off the shelf and hope for the best, but that’s a gamble. Before you even choose a unit, you need to test your water to determine its hardness level. This simple test tells you exactly how many mineral grains per gallon your new system needs to handle. If you skip this step, you could end up with a softener that’s too weak for your water, leaving you with the same hard water problems you started with. Or, you might overspend on a system that’s more powerful than you need. Testing first ensures you get the right tool for the job.
Using the wrong salt or settings
Once your softener is installed, your job isn’t quite done. You need to program it based on your water hardness level and use the right kind of salt. Your manufacturer’s guide will specify whether to use salt pellets, crystals, or blocks. Using the wrong type can reduce efficiency and even lead to a “salt bridge”—a hard crust that forms in the brine tank and stops the system from working. Be sure to check the salt level monthly and keep the tank at least half full. Correct settings and good quality salt are essential for keeping your system running smoothly and effectively.
Test and Troubleshoot Your New System
You’ve done the hard part, and your new water softener is installed. Now it’s time for the moment of truth: making sure it works perfectly. This final phase is all about testing your connections, checking the water quality, and knowing how to handle any little hiccups that might pop up. Taking the time to test and troubleshoot now will save you from headaches later and ensure you get all the benefits of soft water from day one. A thorough check confirms your hard work paid off and that your home’s plumbing is in great shape.
Running your first performance check
With the installation complete, it’s time to bring your system to life. Start by slowly turning your main water supply back on. The first thing you want to do is carefully inspect every connection point you worked on. Look for any drips or moisture. Even a tiny bead of water can signal a problem, so take your time. If you spot a leak that you can’t seem to fix, it might be time to call for a professional water leak repair. Once you’re confident everything is watertight, plug in the unit and run it through its first regeneration cycle. Listen for the sounds of the system working—you should hear water flowing and the motor running at different stages, but no loud clanking or grinding.
How to monitor water quality and pressure
The best way to know if your water softener is doing its job is to test the water. You can grab a simple water hardness test kit from most hardware stores. Test a sample from a faucet both before and after the softener to see the difference. The “after” test should show a significant drop in mineral content, confirming the system is working. You should also pay attention to your home’s water pressure. While a very slight change can be normal, a major drop in pressure could point to an installation error or a blockage. Consistent, strong water flow is a sign of a healthy plumbing system.
Quick fixes for common issues
If your water doesn’t feel soft after a day or two, don’t panic. There are a few simple things you can check yourself. First, make sure there’s enough salt in the brine tank and that a hard “salt bridge” hasn’t formed over the water. If it has, you can carefully break it up with a broom handle. Also, double-check the settings on the control valve to ensure they match your water hardness level. If you’ve tried these simple fixes and are still dealing with hard water or low pressure, it’s best to get a professional opinion. For any complex issues, a call to your local residential plumbing experts can get your system running right.
Keeping Your Water Softener Running Smoothly
Your water softener is installed and ready to go—that’s fantastic! Now, let’s talk about how to keep it working efficiently for years to come. Just like any other major appliance in your home, your water softener needs a little routine care to perform at its best. The good news is that the maintenance is pretty straightforward. A few simple, regular tasks will ensure you continue to enjoy all the benefits of soft water, from spot-free dishes and brighter laundry to smoother skin and hair. By staying on top of these checks, you can prevent common issues before they start and get the most out of your investment.
Checking and refilling the salt
Think of the salt in your brine tank as the fuel for your water softener. It’s essential for the regeneration cycle, which is how the system cleans the resin beads that trap hard minerals. Make it a habit to check the salt level at least once a month. A good rule of thumb is to keep the tank at least half full with high-quality salt pellets or crystals designed for water softeners. Occasionally, a hard crust called a “salt bridge” can form over the water, preventing the salt from dissolving. If you notice the salt level isn’t changing, you can usually break it up gently with a broom handle.
Your cleaning and sanitizing schedule
Over time, sediment can build up in the brine tank, so it’s a good idea to give it a thorough cleaning every 6 to 12 months. This just means emptying the tank, giving the inside a good scrub with mild soap and water, and rinsing it completely before you refill it. To keep things hygienic, you can also sanitize the system every few months with a special water softener cleanser to prevent any bacteria from growing. If you’d rather not add another task to your to-do list, you can always schedule a routine maintenance check with a professional.
Signs your system needs a tune-up
Even with great care, you might notice signs that your system isn’t working as it should. If you start seeing hard water spots on your dishes or find your soap isn’t lathering well, it’s time to do a quick check. First, look at the simple things: Is the salt tank full? Is there a salt bridge? Is the unit plugged in and are the settings correct? Other red flags include a sudden drop in water pressure or unusual noises. If you’ve checked the basics and your water still feels hard, it might be time for a professional tune-up. An experienced plumber can diagnose more complex issues, like failing resin beads or an internal mechanical problem.
DIY vs. Hiring a Pro: What’s Right for You?
Deciding whether to install a water softener yourself or call in a professional is a big part of the process. While rolling up your sleeves can be rewarding, some jobs are best left to the experts. It really comes down to your home’s plumbing setup, your own skill set, and how much time you’re willing to invest.
Think about it this way: a straightforward installation in a pre-plumbed home might be a great weekend project. But if you run into unexpected issues with older pipes or complex connections, a simple task can quickly turn into a major headache. Let’s break down the factors to help you make the right call for your home and your peace of mind.
The pros and cons of a DIY install
Tackling a water softener installation yourself can definitely save you some money on labor costs. If you’re comfortable with basic plumbing tasks like cutting and soldering pipes and you already have the right tools, a DIY install is certainly possible. For homes with a pre-existing water softener loop, the process is much simpler because the connections are already in place.
However, if your home isn’t pre-plumbed for a softener, the job gets significantly more complex. You’ll need to locate and cut into your main water line, run new pipes, and potentially get a building permit. This is where a simple project can become overwhelming. One wrong cut or a leaky fitting could lead to water damage and costly water leak repairs.
Why a professional installation pays off
Hiring a professional plumber provides a level of assurance that’s hard to match. If your home has older pipes or a complicated plumbing layout, an expert can handle the challenges without risking damage. Professionals ensure the entire installation meets local building codes and regulations, which is something many homeowners overlook. Plus, most professional installations come with a warranty on the labor, giving you an extra layer of protection.
While it costs more upfront, a professional water heater installation or softener setup can prevent expensive mistakes down the road. An expert will make sure your system is configured for optimal performance, which helps you get the most out of your investment and can even save you money in the long run.
Know when to call a licensed plumber
If you feel even slightly unsure about your ability to install the water softener correctly, it’s always a good idea to consult a professional. A licensed plumber can assess your home’s setup and give you a clear idea of what the job involves. This is especially true if you’ve checked and confirmed your home does not have a water softener loop—adding one is a job that requires professional skill.
Think of it as an investment in getting the job done right the first time. A quick consultation can save you from potential frustration and unexpected costs. When you need reliable residential plumbing services, having an expert on your side makes all the difference.
Related Articles
Frequently Asked Questions
How often will I need to add salt to my water softener? This depends on your water hardness and how much water your household uses, but a good general guideline is to check the salt level once a month. You don’t need to keep the tank filled to the brim; maintaining a level that’s about half-full is perfect. A family of four with moderately hard water might go through a 40-pound bag of salt every two to three months.
Is softened water safe to drink? Yes, for most people, softened water is perfectly safe to drink. The process exchanges hard minerals like calcium and magnesium for a small amount of sodium. The amount of sodium added is quite low—for perspective, a slice of white bread typically has more sodium than a glass of softened water. If you are on a strict low-sodium diet, you may want to consult your doctor or consider a reverse osmosis system for your drinking water.
Why shouldn’t I use soft water for my lawn and garden? While soft water is great for your indoor plumbing, it’s not ideal for your plants. The sodium that’s added during the softening process can build up in the soil over time, which can harm or even kill your grass and garden plants. That’s why the bypass valve is so useful—it allows you to easily switch to hard water for your outdoor spigots.
What’s the average lifespan of a water softener? A quality water softener that is properly maintained can last anywhere from 10 to 15 years, and sometimes even longer. Regular maintenance, like keeping the salt tank clean and using the right kind of salt, plays a big role in its longevity. Think of it as a long-term investment in protecting your home’s entire plumbing system.
Can I just use a water filter instead of a softener? While both improve your water, they do very different jobs. A water softener specifically removes the minerals that cause hardness, which prevents scale buildup in your pipes and appliances. A water filter, on the other hand, is designed to remove contaminants like chlorine, sediment, and bacteria to improve the taste and smell of your water. They are not interchangeable, though some homeowners choose to use both systems for the best possible water quality.