












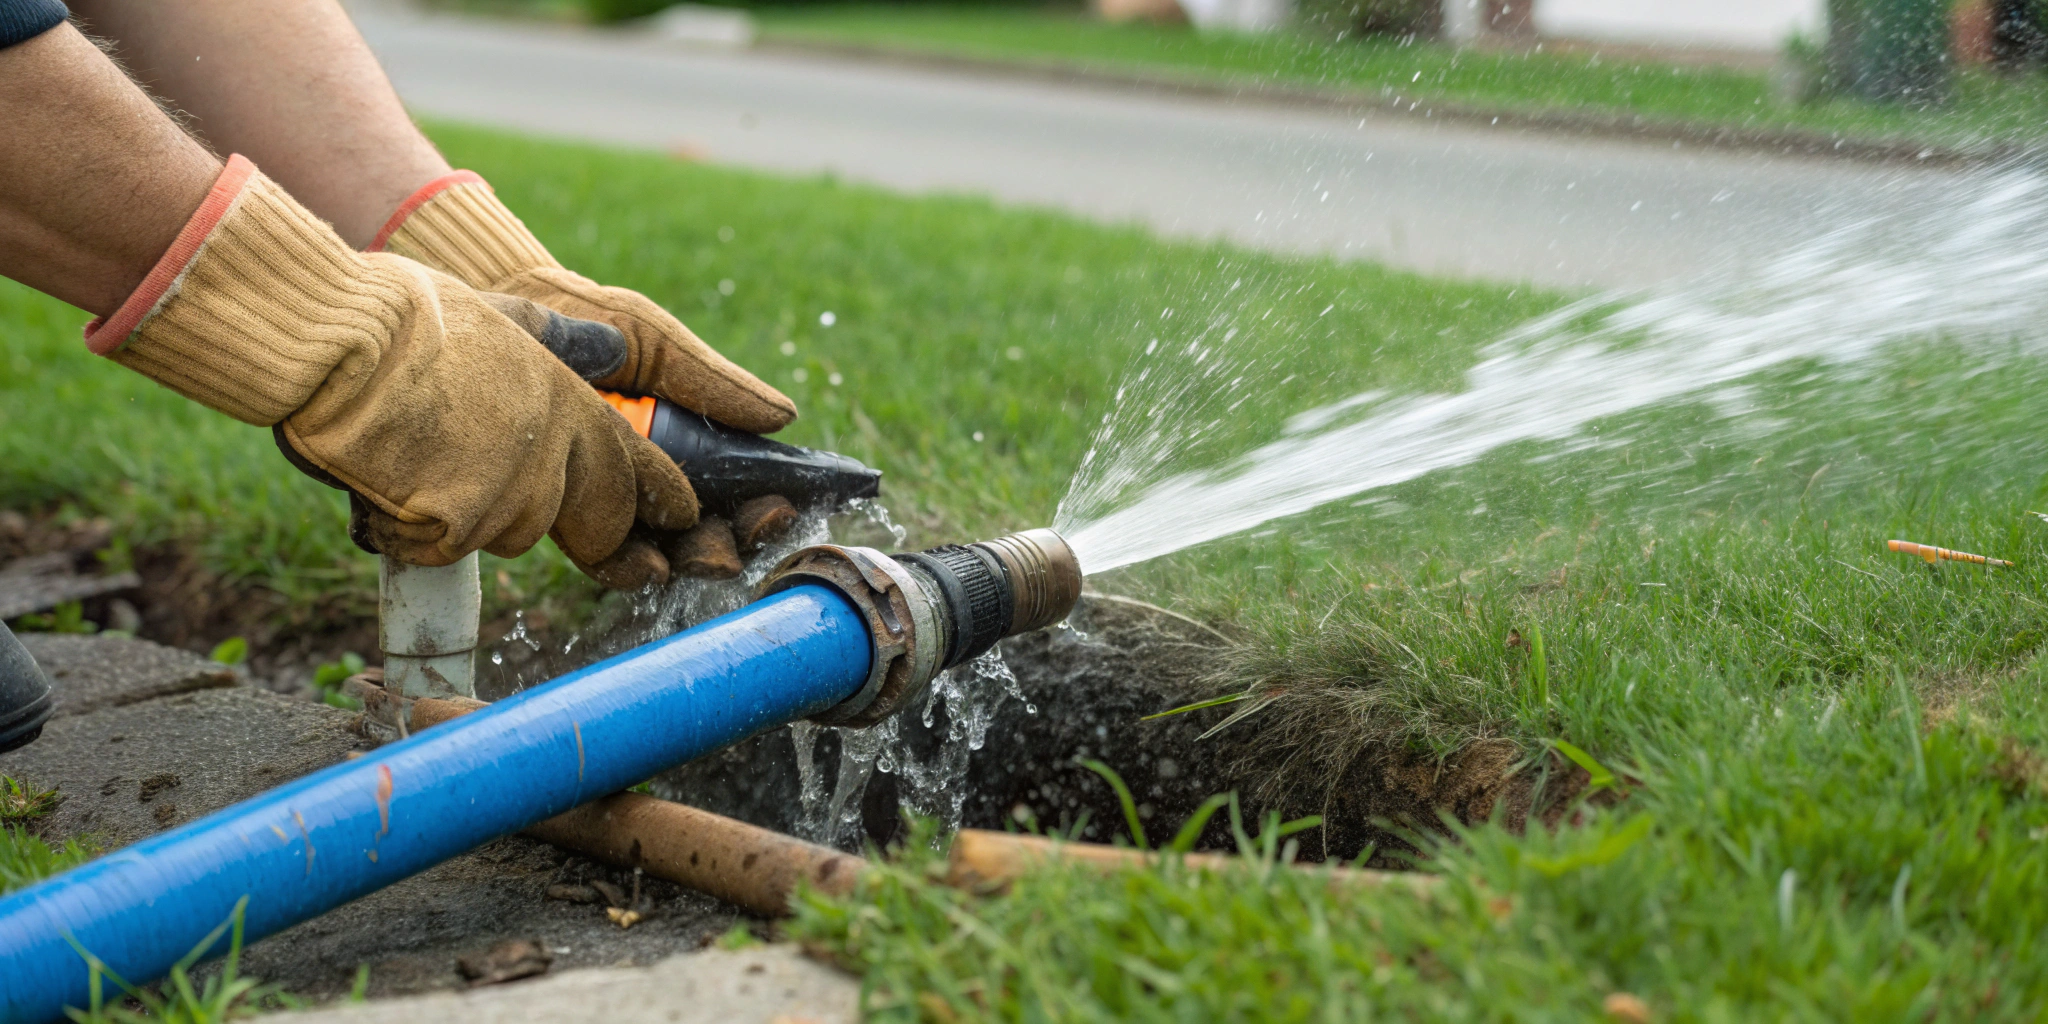
As a homeowner, you prepare for a lot of things, but a sudden river flowing across your property probably isn’t at the top of the list. A burst pipe outside your home is more than just an inconvenience; it’s an emergency that can cause serious damage to your foundation, landscaping, and even your home’s electrical systems. Acting quickly and correctly is critical. This isn’t just about knowing how to fix a burst water pipe outside your house; it’s about knowing what to do in the first five minutes to prevent thousands of dollars in damage. This article is your emergency action plan, detailing the crucial first steps to secure your home and minimize the fallout before a professional plumber even arrives.
Key Takeaways
- Act Fast: Water First, Then Power: Before doing anything else, locate and turn off your main water shut-off valve to stop the flow, then cut power to the affected area to eliminate electrical hazards.
- Assess the Damage to Guide Your Next Step: A temporary patch can work for a small, accessible leak, but major breaks, buried pipes, or any uncertainty means it’s time to call a professional for a safe and permanent repair.
- Prepare for Winter to Prevent Future Bursts: Simple seasonal tasks like insulating exposed pipes and disconnecting outdoor hoses are the most effective ways to protect your plumbing from freezing and avoid a repeat emergency.
An Outdoor Pipe Burst? Here Are Your First Steps
Discovering a burst pipe outside your home can feel overwhelming. Whether it’s a small leak flooding your flowerbed or a major break sending water across your lawn, your first instinct might be to panic. But taking a few deep breaths and following a clear plan can minimize the damage and get the situation under control quickly. Acting fast is key, and these next steps are your immediate priority before you even think about repairs.
Turn Off Your Home’s Main Water Supply
Before you do anything else, you need to stop the flow of water. This is the single most important step to prevent further flooding and property damage. You’ll need to locate your home’s main water shut-off valve. It’s typically found in the basement, a crawl space, or in a utility box in your yard near the street. The valve will have either a wheel-style handle that you turn clockwise or a lever-style handle that you turn a quarter-turn. Turning this off will cut the water supply to your entire property, stopping the leak at its source. If you’re having trouble finding it, don’t waste time—it’s a crucial piece of information every homeowner should know. This immediate action is the first line of defense in any water leak repair.
Shut Off Power to Nearby Electrical Sources
Water and electricity are a dangerous combination. If the burst pipe is near any outdoor electrical systems—like landscape lighting, outlets, or your air conditioning unit—you must shut off the power immediately to prevent the risk of electric shock. Head to your home’s main breaker box and switch off the breakers that control any circuits in the affected area. If you’re unsure which breakers correspond to which areas, it’s safest to shut off the main breaker for the entire house. Your safety is the top priority. Once the power is off, you can address the plumbing issue without worrying about electrical hazards. This is a critical safety measure for all residential plumbing emergencies.
Secure the Area for Safety
With the water and power shut off, take a moment to make the area safe for everyone. The ground will likely be saturated and muddy, creating a serious slip-and-fall hazard. Keep children and pets away from the area to ensure they don’t get hurt. If the burst pipe has created a large hole or trench, mark it clearly so no one accidentally steps into it. If water has pooled near your home’s foundation or if you have any concerns about structural stability, it’s best to keep a safe distance. Securing the scene prevents further accidents and allows you or a professional plumber to assess the damage without any added risks.
Document the Damage for Your Insurance Claim
Once the area is safe, pull out your phone and start documenting everything. You’ll need this evidence when you file a claim with your homeowner’s insurance. Take clear photos and videos of the burst pipe itself, the water gushing out (if you can do so safely before shutting it off), and the full extent of the damage. Capture images of any flooded parts of your yard, damage to landscaping, erosion near your foundation, and any harm to patios, walkways, or other structures. The more detailed your documentation is, the smoother your insurance claim process will be. Be thorough—it’s better to have too many photos than not enough.
How to Find and Assess the Pipe Damage
Once you’ve shut off the water and power, it’s time to play detective. Finding the exact location and understanding the extent of the damage is your next critical step. This assessment will help you figure out if a temporary fix is possible or if you need to call for professional backup right away. Taking a few moments to carefully inspect the situation can save you a lot of headaches later and gives you the clear information you’ll need when you call for a water leak repair. A thorough look will also help you gather the necessary details for your insurance claim.
Pinpoint the Source of the Burst
Start by following the path of the water. Look for the spot where the water is most concentrated. You might see a visible split or crack in the pipe, or you may find a soggy, sunken area in your yard if the pipe is underground. If the burst is near your home’s foundation, check for water seeping into your basement or crawl space. For pipes along exterior walls, look for damp spots or discoloration on the siding. Finding the precise origin of the leak is the first step toward getting it under control.
Check Your Property for Water Damage
A burst pipe outside can cause more than just a muddy lawn. Walk around your property and inspect for any related damage. Check your home’s foundation for new cracks or water stains. Look for signs of erosion or sinkholes forming in your yard. It’s also a good idea to check your basement or crawlspace for any water that may have found its way inside. Be sure to take clear photos and videos of the burst pipe and any affected areas. This documentation is essential when you file a claim with your insurance company.
Determine the Severity of the Break
Next, try to gauge how serious the break is. Is it a small, hairline crack with a slow drip, or is it a major rupture that was gushing water? A minor leak might be manageable with a temporary patch, but a large split or a completely separated pipe is a different story. The severity will determine your next move. A significant break requires immediate professional attention, as it can quickly lead to more extensive property damage and soil erosion. Don’t underestimate even a small leak, as it can worsen under pressure.
See if the Pipe Is Accessible for Repair
Consider the pipe’s location. Is it exposed and easy to get to, or is it buried several feet underground? A pipe that’s above ground is much easier to access for a temporary fix. However, if the pipe is underground, behind a wall, or close to electrical wiring or gas lines, you should not attempt a DIY repair. Digging without knowing what’s below can be dangerous. In these situations, it’s safest to leave the job to professionals who have the right tools and expertise for complex residential plumbing issues.
Identify the Type of Pipe Material
Knowing what kind of pipe you’re dealing with can be very helpful. Common materials for outdoor pipes include PVC (white or gray plastic), copper, and galvanized steel. The material will dictate what kind of temporary patch or clamp you might need. It can also offer clues as to why the pipe burst. For example, older galvanized pipes are prone to rust and corrosion, while PVC can become brittle in freezing temperatures. This information will be useful whether you’re attempting a quick fix or explaining the situation to a plumber.
Temporary Fixes to Stop the Leak Until Help Arrives
Once you’ve shut off the water, your next goal is to contain the leak until a professional can arrive. A temporary patch can prevent further water damage to your yard, foundation, or home. Think of these as first aid for your plumbing—they aren’t permanent solutions, but they can make a huge difference in a stressful situation. These quick fixes are designed to buy you time and minimize the mess, turning a potential disaster into a manageable inconvenience while you wait for a permanent fix.
Keep in mind that these fixes are best for smaller, more accessible breaks. If you’re dealing with a large split, a gushing pipe, or a leak at a joint or fitting, attempting a DIY patch might not hold. If you feel unsure about attempting a repair, your best move is to focus on damage control and call a plumber right away. The last thing you want is for a temporary patch to fail and cause even more flooding. Having a few basic tools and materials on hand can help you confidently manage minor leaks and give you peace of mind while you wait for an expert to arrive.
Use Pipe Repair Clamps for Easy-to-Reach Breaks
A pipe repair clamp is one of the most effective temporary fixes you can use. It’s essentially a metal sleeve with a rubber gasket inside that wraps around the pipe. When you tighten the clamp, the rubber creates a strong seal over the crack or hole, stopping the leak. These are great for straight sections of pipe that you can easily access. You can find them at most hardware stores, and they’re a fantastic item to have in your emergency toolkit. Just make sure you get the right size for your pipe, as a snug fit is essential for it to work correctly.
Apply Waterproof Tape for Minor Cracks
For very small hairline cracks or pinhole leaks, waterproof silicone tape can be a quick and easy fix. This isn’t your average duct tape; it’s a self-fusing tape that creates a watertight seal when stretched and wrapped tightly around itself. To use it, start wrapping a few inches before the leak and continue a few inches past it, overlapping the tape generously as you go. While it’s a handy solution for tiny leaks, it’s the least durable option and should be considered a very short-term patch meant to hold for only a few hours.
Try Rubber Patches with Hose Clamps
If you don’t have a pipe clamp, you can create a similar fix using a piece of rubber and a couple of hose clamps. A small piece of a bicycle inner tube or a sheet of thick rubber will work perfectly. Simply wrap the rubber tightly over the damaged section of the pipe, ensuring it covers the break completely. Then, place a hose clamp on either side of the leak and tighten them down securely. This applies pressure to the rubber, creating a seal that can hold back the water until a permanent repair is made.
Essential Tools to Keep on Hand for Emergencies
Being prepared can turn a plumbing crisis into a manageable problem. It’s a good idea to have an emergency plumbing kit ready to go. Include a few pipe repair clamps in various sizes, a roll of waterproof silicone tape, and a couple of adjustable hose clamps. Beyond patching materials, a shop-vac is incredibly useful for quickly removing standing water from the area, which can prevent soil erosion and foundation issues. Having buckets and heavy-duty towels on hand will also help you manage the mess and prevent further damage while you wait for help to arrive.
Know When to Skip the DIY and Call Action Craft Experts
These temporary fixes are meant to control a minor leak, not solve a major plumbing failure. If the pipe has a long split, is crushed, or is leaking from a joint, a DIY patch won’t be enough. In these cases, attempting a temporary fix can sometimes make the problem worse or give you a false sense of security. Your priority should be to prevent further property damage. For any significant break, it’s time to call for professional water leak repair. Our team at Action Craft Experts can not only fix the burst pipe correctly but also identify the cause to help prevent it from happening again.
How to Prevent Future Outdoor Pipe Bursts
Dealing with a burst pipe is a stressful and expensive ordeal. The good news is that with a little preparation, you can significantly reduce the risk of it happening again. Taking a few preventative steps, especially before Spokane’s winter weather sets in, can protect your property and give you peace of mind. Think of it as a seasonal check-up for your home’s plumbing system. These proactive measures are your best defense against the costly water damage and emergency repairs that come with a frozen, burst pipe. Here’s how you can get ahead of the problem.
Insulate Exposed Pipes Before Winter Hits
Any pipe exposed to the cold is a potential risk. This includes pipes in your crawl space, garage, or along exterior walls. Wrapping these pipes with foam insulation sleeves is a simple and effective first step. For pipes in extremely cold areas or those that have frozen before, consider installing heat tape or heating cables. Some modern
Drain and Shut Off Your Outdoor Faucets
This is a non-negotiable task on your fall to-do list. Before the first freeze, you need to disconnect all garden hoses from your outdoor spigots. Next, find the shut-off valve for each outdoor faucet—it’s usually located inside your home, in the basement or a crawl space near the faucet. Turn the valve to the “off” position. Then, go back outside and turn on the spigot to let any remaining water drain out completely. This simple process ensures there’s no water left in the pipe to freeze, expand, and cause a burst.
Upgrade to Frost-Free Hose Bibs
If you’re tired of the seasonal ritual of shutting off your outdoor water, upgrading to frost-free hose bibs is a fantastic long-term solution. These clever faucets are designed with a long stem that places the actual water valve deep inside your home, where it’s protected from the freezing outdoor temperatures. When you turn off the handle outside, the water stops flowing in the warm part of your house, and the exterior portion of the pipe drains automatically. We can handle the plumbing fixture installation to give you a permanent fix for this common winter problem.
Keep an Eye on Temperatures During Cold Snaps
Even with preparation, a severe cold snap can put your pipes to the test. When you know temperatures are going to plummet, let cold water drip slowly from a faucet inside your home. Keeping the water moving, even just a trickle, helps prevent it from freezing and relieves pressure building up in the pipes. It might seem counterintuitive to waste water, but it’s far less costly than dealing with the aftermath of a burst pipe. If you do end up with a problem, our team is always ready to help with water leak repair.
Schedule Regular Professional Plumbing Inspections
Sometimes, the most vulnerable parts of your plumbing system aren’t obvious. Scheduling a regular inspection with a professional plumber allows an expert to assess your entire system, identify potential weak spots, and recommend specific preventative measures for your home. A professional can check for corrosion, secure loose pipes, and ensure your insulation is adequate for Spokane’s climate. This kind of proactive maintenance is the best way to catch small issues before they turn into major disasters. Think of it as an annual health check for your home’s plumbing.
Learn the Warning Signs Before a Pipe Bursts
Your pipes will often give you subtle clues that something is wrong before a complete failure. Pay attention to any sudden drops in water pressure, which could indicate a blockage or a leak somewhere in the system. Listen for strange sounds like hissing, banging, or dripping inside your walls when the water is off. You should also keep an eye out for new water stains on ceilings or walls, damp spots on the floor, or a musty smell. Catching these warning signs early and calling for a plumbing leak repair can save you from a much bigger headache down the road.
Related Articles
- Frozen Pipes Recovery: What to Do if Your Pipes Cracked
- 5 Steps to Identifying Frozen Pipes – Action Craft Experts
- 24/7 Burst Pipe Plumbing Service: An Expert Guide
- How to Tell If a Pipe Burst in the Wall: 7 Signs
- How Much to Fix a Broken Water Pipe Underground?
Frequently Asked Questions
I can’t find my main water shut-off valve. What should I do? First, don’t panic. The most common locations are in a basement, crawl space, or a utility closet near where the water line enters your house. If it’s not inside, check your yard for a covered box near the street, often called a water meter box. If you still can’t locate it after a quick search, your next call should be to a professional plumber. In an emergency like a burst pipe, time is critical, and a plumber can find it quickly and get the water shut off to prevent further damage.
Is a burst outdoor pipe usually covered by homeowner’s insurance? Coverage really depends on your specific policy and the cause of the break. Typically, if the burst was sudden and accidental, like from freezing, your policy may cover the cost of repairs and water damage. However, if the damage is due to neglect or lack of maintenance, your claim could be denied. This is why documenting everything with photos and videos is so important. Your best bet is to contact your insurance agent as soon as possible to review your policy and start the claims process.
How can I tell if a pipe is frozen before it bursts? Your plumbing will often give you a few warning signs. The most obvious clue is if you turn on a faucet and only a trickle of water—or no water at all—comes out. You might also see frost forming on the outside of an exposed pipe. If you suspect a pipe is frozen, leave the faucet open slightly to relieve pressure and call a plumber. Trying to thaw it yourself with high heat can be dangerous and may cause the pipe to burst anyway.
Why did my outdoor pipe burst even though it wasn’t freezing outside? While freezing is the most common reason for burst pipes in Spokane, it’s not the only one. Pipes can also fail due to old age and corrosion, especially if they are made of older galvanized steel. High water pressure can put too much stress on the system, and even tree roots can wrap around and crush underground pipes over time. A professional can diagnose the underlying cause to ensure the right repair is made.
Can I just leave a temporary patch on the pipe instead of calling a plumber? A temporary patch is strictly a short-term fix designed to control the situation until a professional arrives. Think of it as first aid for your plumbing. These patches are not built to withstand constant water pressure over the long run and will eventually fail, likely causing another flood. A permanent, professional repair is the only way to ensure the pipe is secure and to prevent more extensive and costly damage down the road.